So I was going to use 1/4" plywood for the bottom, but I could see how not stiff it was, so I opted to redo the corner brackets towards the bottom to allow for 1/2" plywood. This also means you are ONLY buying 1/2" ply to build this cabinet. I made another change I'll mention later.
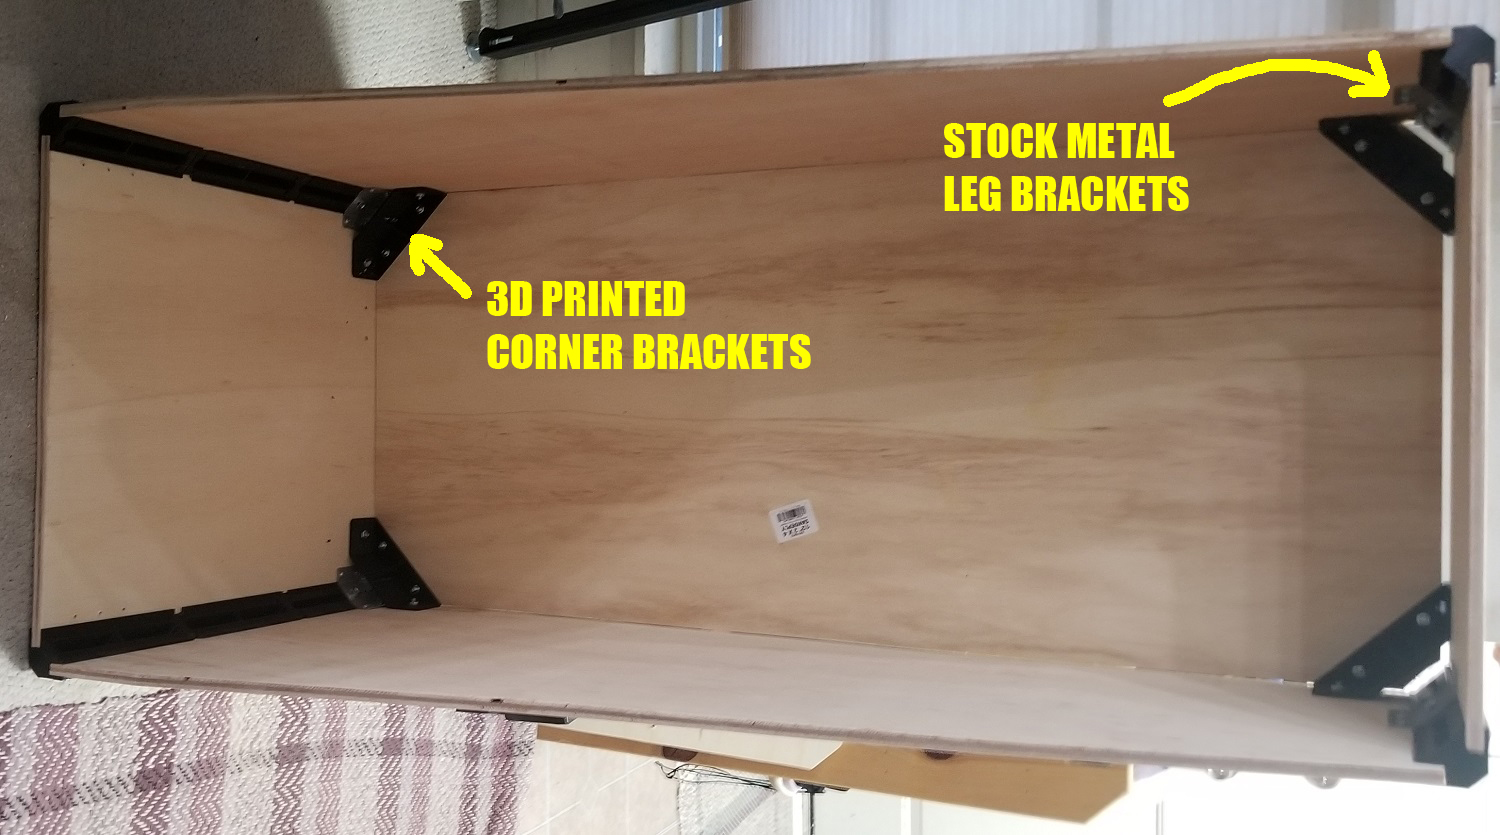
So even though the stock metal leg brackets helped a lot to tie things in, I decided to also design and 3d print some extra corner brackets. I pretty much set the plywood inside the box, laid the bracket in place, marked the holes, and started drilling. Then go to town with 1/4" screws and nuts.

Apparently I didn't cut the sides quite short enough because there's a bit of a gap toward the front. Again, this is me just trying this out so gaps aren't bothering me right now. My next cabinet I'll take my time to make sure things are cut more precise.

At this point, the cabinet felt pretty good, but I knew the center was still not tied very well, so again I designed and 3d printed some more brackets.
So one thing I decided to do is make the hole locations in the front and back different so the entire cabinet leans just a little bit. This means if I decide to make the playfield parallel with the bottom of the cabinet (which I would prefer to do), by default I will have approximately 4.5 degrees. If the rear legs are extended an inch it should reach the standard 6.5 degrees.
Now I'm not going to say this is exactly equivalent to a standard cabinet. It's lighter (which is not a bad thing). There seems to be a feeling of something slightly not tight (but I can't narrow it down where that's coming from). However, I'm very confident that this would hold up to nudging.
Now where do we go from here? Well a few things:
1. I had thought about selling a kit. I'm not sure that will ever work out because the way the corners are designed the tooling would require slides (which would make it impossible to prototype). Me 3D printing them would not be cost effective. Even if I use bigger tips and cut printing time down to 5 hours, I'm still looking at 50 hours (which if I'm charging my standard $5/hour I would have to charge $250) which is starting to creep into real cabinet pricing. Another thought I had, upload the STL files and ask for donations. Another thought.. Upload the native solidworks files, make this open source and make the homebrew pinball explode.
2. I still have a few things to add before this is a useable cabinet, but the hard parts are done. Once I'm able to throw a blank playfield in, I'm likely going to start throwing components in and make a flipping whitewood. I would like my wife to get involved with the project this time, and I figure if it's sitting there waiting to be played she can throw ideas at it.
Based on what I've learned, I may end up designing cabinet 2.0 and perhaps donating this cabinet to someone local that doesn't care if this cabinet has issues. I also need to ditch my F14 cabinet.


No comments:
Post a Comment