Sunday, September 16, 2012

Picked up a black knight today

4 hour drive each way to Indianapolis, but it's home.  $750 is what he asked for it (he paid $800 9 years ago), and he had other people message him when I dragged my ass, but he did keep his word and not take other offers.  Now before you ask me how I found this steal of a deal, it needs work.  When I got there, it was sitting in the garage covered.  Right off the bat, I could see the rust on the inside of the legs (black paint on the outside, probably to cover rust).  No water damage on the back, that's good.  He pulls off the blanket, playfield has planking but no wear (not bad for an original playfield that's 32 years old).  Ok, that's a good sign, at least I can sand and touch it up easily.  Then I open up the backbox, boards look clean, no jacked connectors, no battery leak damage.  I fire it up, I get power, but no displays.  I decide even though the fuse holder is cracked off, maybe there's enough contact still if I bend it over.  I pop a new fuse in (since the old one is sitting at the bottom of the backbox), fire it up, I get displays.  Unfortunately, something is odd with the coinbox because a quarter gets jammed, and I don't see switches for the coin to hit, so I fumble and manage to get some credits up.  Unfortunately, the start button doesn't work (leaf switch is fouled up), but I mange to manually connect it and get a game started.  The flippers work (where they didn't before), but they are jacked.  They are loose as hell, and not really worth playing.  Also the balls aren't ejecting because.. get this, the solenoid is literally hanging from the playfield because the screws stripped out (which I will have to fill in).  So all in all, nothing that seems too difficult to repair, just needs a GOOD cleaning and a few things fixed and it might actually play somewhat normal again.

There is at least one cracked plastic, the backglass has some very minor flaking, but the cabinet is in good shape (just needs a little wood fill in black areas, the artwork is nearly perfect).

Where did I find it? Random non pinball collector who had one sitting in their garage not working decided to jump onto pinside, see who was looking for one in the chicago area, decided to message me. A few messages go back n forth, finally she posts photos in the sell market. I'm like "crap! now it's public!". So I finally call, and her husband answers last weekend. I explain I can't make it out that weekend, but can pick it up the following weekend on Sunday.

I'm sort of glad I was more prepared this time, bringing a toolbox with essentials (wrenches, screwdriver, fuses, multimeter, flashlight, drill with bits and extension cord (in case he went "whoops, I don't know where the keys are).  I wasn't about to drive 4 hours each way, only to find that I couldn't take something apart, or test to see how badly damaged it might have been (sellers aren't always so honest).

Here are some photos:


Friday, September 14, 2012

door actuator pin - starting the design

Ok, so I may not have even drilled the first hole in wood, but that's just how I am.  I tend to overplan, but it really does prevent issues from happening during assembly.  It's the measure 10 times cut once mantra that loops in my head.

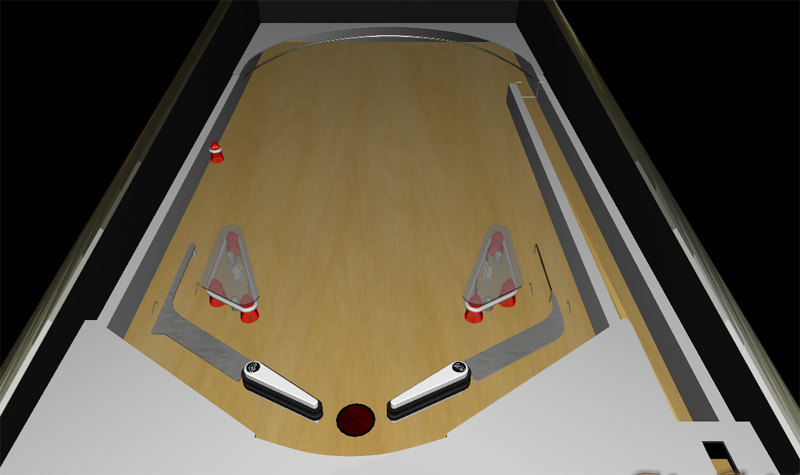
Anyway, I have enough modeled in solidworks at this point where I could at least get the flippers mounted and wired up.  I started creating an apron troft, even if I don't quite yet have the ball eject worked out (probably going to use another actuator with a lever that flings it up).  I plan on using 1/16" aluminum and getting it lasered from a place like ponoko, as I think it will cost less than waterjet (my local place tends to do more industrial jobs, and usually has a minimal $50 lot charge plus programming)  My goal is to get all the rails to fit within a 12" x 24" piece, which on mcmaster is about $22.

Here are some photos of what I have so far.  I decided to go minimalist (and save precious playfield space) by having the ball eject ASAP.  This has been done on other pins, and it seems to work well:


Since my mechanism doesn't have a base plate, or any specific pinball parts (pawls, flipper bats and bushings are non-specific to any company), it will be cost effective and not infringe on any design patents.  Also the hole on the end of the solenoid should interface with the pawl beautifully.

Tuesday, September 11, 2012

New direction for homebrew pinball

I know my last goal was to go old school and create an all mechanical pinball (might still do that one day), but I need to jump ahead at least a little bit.  So I'm going to move ahead with using the door actuators for powering the flippers, I've got some old used flipper bushings, still have my new yellow flipper bats, I believe I have a couple pawls to connect the bats to the actuators, a spare ball, a full plunger assembly.  In fact other than having an automated ball trowl, and perhaps a few posts to stick onto the playfield, I believe I have all the parts I need to get a semi-working pinball going.

Here's my idea.. Crunching some numbers, I believe I can get a working full-size prototype starter kit (safe kid version running off 12v) for roughly $100 cost, and an "adult" 48V version for about $200.

My idea is "pinball in a box".  Basically in the kit you would get a basic playfield layout (talking flippers, couple side bumpers, an outlane guide, shooter lane), would end up looking something like the default starter playfield in future pinball (but in physical form):
No scoring, no ramps, no layout, just a blank canvas with the very basics to get you started.  I would include a template where you would drill holes for posts, the flippers, the outlanes, and you would simply cut/drill a piece of plywood you pickup at your local hardware store (save the cost of shipping heavy wood if it's something you can buy local, though I might sell pre-made designs at some point).

This could be perfect for the hobbyist that just wants to mess around, but the kid-friendly version would be really neat.  A parent (particularly one that is already in the pinball hobby) could buy this kit, let his kid layout a pinball like he wants, draw stuff on the playfield, then the parent helps clearcoat it.  I can't imagine what better gift you could give a kid than letting him design his own pinball.  Problem that exists right now, nothing like this exists.  The closest you could get to this point is finding an older pinball that has a scorched playfield (but functioning), but even then your looking at between $400-$600 easily.

Tuesday, September 4, 2012

Pin-2000 for a demolition man

This is the coolest mod I've seen in a long time.  This guy threw a P-roc system in his machine, wrote up some code, mounted a 26" LCD above the backbox, and turned it into what I believe is the first wide-body P2k machine.  Even though it's early code, he's got objects that are breakable, and some neat pop-up menus (not to mention a great scoring system).  I can't wait to see what he does with it:
http://pinside.com/pinball/forum/topic/dm-p2k-concept#post-391920


Friday, August 31, 2012

bought a random playfield

Ok, so I have no actual use for this since I don't own this pin, but fer $5 + $15 shipping, I figured how could I go wrong?  It seems to be in decent shape, and I suppose my plan is to touch-up all the wear spots (after a good sanding), and then clearcoat it.  I can then sell it as a "refurbished" playfield for much more, or I thought about possibly turning it into a really cool ceiling light (populate all the holes with bulb holders, wire it all up in parallel, power it up with a 6VDC wallwart).  Heck, maybe I'll just turn it into a coffee table, I don't know.  Point is, one of the things I liked best about my last shop job was turning a crappy mylared playfield into a vibrant good looking pin.  Here's some photos of it from ebay:


Tuesday, August 28, 2012

gameroom theme


So while some people will simply finish a basement, throw down some tile, paint the walls, and throw some decorations up, I want to do a theme. This isn't unheard of, just takes a little more effort. I know what my theme is going to be without a doubt, I just have to figure out how I want to do it.


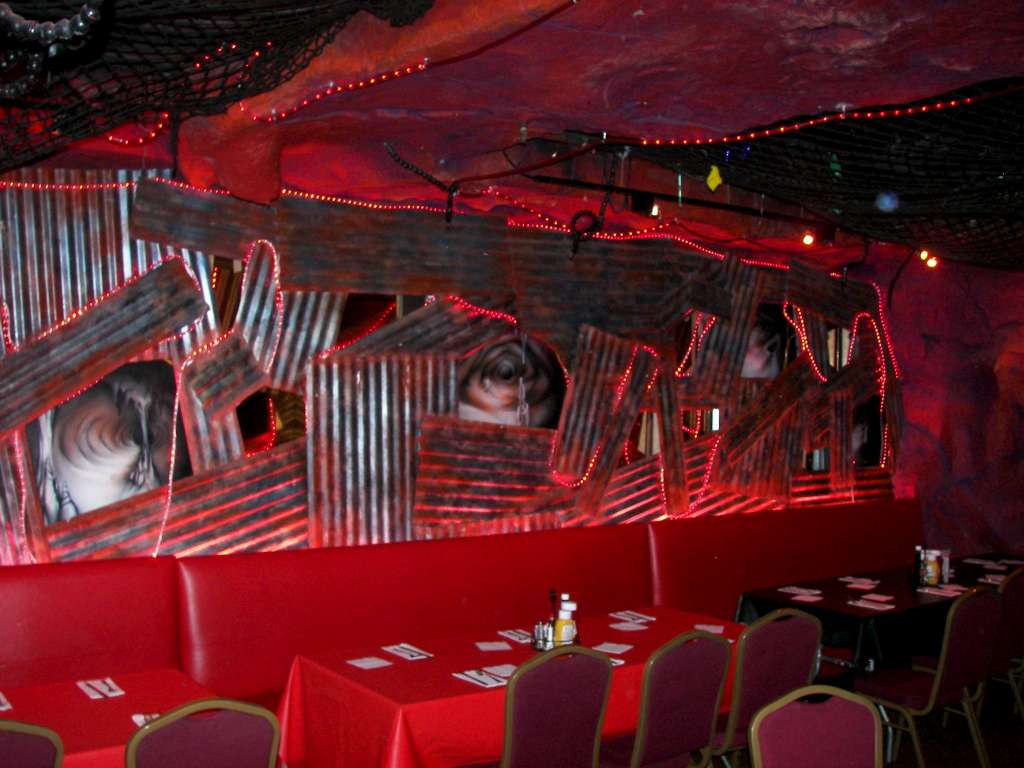
Basically I want to loosely base it off a restaurant that used to be at woodfield mall in schaumburg back in 2001 (it closed after a couple years). There was also one in new york, which just closed this year. It was called Mars 2112.


It had a cheesy entrance, you stepped into a "spaceship", a video played that was supposed to be a window looking out like you were actually traveling to Mars.

That cheesiness aside, the decor of the restaurant was really cool. You had red rock walls, making it look like it was carved out of a cave on Mars. There were space scenes airbrushed to simulate a skyline. The waitresses were dressed as aliens, then they had this wacky scientist who's supposedly responsible for designing the restaurant:


There was also one of those laser projection displays shooting messages on the wall.(which I would love to find a reasonably cheap version of)


Now I'm only taking this theme loosely based.  I don't want a "mars" theme, but I like how they implimented it.  I would like to

create a generic planet, something more like the moon. Also, I want lots of NASA embedded into it. Starting with the stairs, I want the ceiling to be a sky. I plan on doing this by taking some thin particle board, cutting a bunch of holes in it, and backlighting it with LED christmas lights (which will run off the bulb socket at the top of the stairs. I also want a rotating sign above the archway, which will tap into the arcade growing up, which is "Galaxy World":


I also want to have lots of that white structure steel that you see


Friday, June 8, 2012

ideas flowing


So I've gone back n forth a couple times with the other blogger.  Ideas are just flowing, did some massive sketching today at work.  It's really rough, but I can totally see some amazing mechanisms coming out of the original theme we both agree should be made.

I think the best way to move forward is for me to start sketching some ideas of each section, sort of like a storyboard, and then place them in their appropriate section of the playfield.  Then once we agree from that point, I can actually start modeling up some of these parts (I already modeled one up just to see what it would look like).  All I can say is that if this project really came to light, it would rock the pinball world with it's innovation.  I just hope it doesn't turn to vaporware because this pin NEEDS to be made.